The Basics Of Planting Vegetable Gardens

Not a lot of people try planting vegetable gardens these days, especially not in the city. What with the busy lifestyle, constrained spaces, and pollution, it seems inconceivable that a vegetable garden would survive. The fact is, you can actually grow them even if you are smack in the middle of a busy city. Its only important that you get the basics of planting vegetable gardens right.

First things first. Soil preparation. This is one of the most basic things that any new gardener will have to learn. Whether you plan to use a plot of land in your backyard or start a vegetable garden in plant boxes, soil preparation plays an important role in whether your vegetable garden will survive or not. There are three types of soil that you need to be familiar with; sand, clay and silt. Sandy soil is loose and helps the roots of plants breathe because it lets the air pass through easily. Clay soil absorbs water faster and keeps it inside longer, a soil composition that has more clay particles in it would be ideal for places that are too hot and the soil dries up quickly. Silt is a fine mixture of sand and clay particles.

When preparing the soil for your vegetable garden, dig up the soil and break off the lumps. Take out the rocks, roots, and weeds while youre at it. Check if you have just the right mixture of sand, silt, and clay before you begin planting vegetable gardens. Ideally, silt and sand should both be 40%, and clay should just be 20%, this is to make sure that the water isnt trapped inside too much that the roots will choke. Also, if the water is trapped too long inside the soil, the roots will rot. One good way to test whether the composition of your soil is good is by scooping out a handful and forming a ball with it. The soil should hold the shape of a ball without too much difficulty. If the soil cannot hold the shape, you might have too much silt or sand in the mixture. If the soil holds the shape but does not crumble easily when you poke it, it might have too much clay in it which you need to balance out with a little silt or sand.

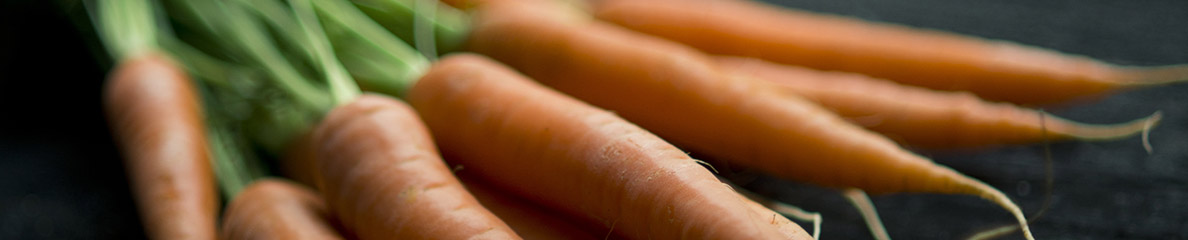
Once you have finished cultivating the soil where you want to plant your vegetables, pick what kind of vegetable you want to grow there. Keep in mind that some vegetables dont grow well when you plant them too close to certain types of other vegetables. Potatoes, for example, shouldnt be planted too close to squash or tomatoes because it inhibits their growth. They can be planted in the same garden, just dont plant them beside each other.

After you have decided on the kind of vegetables you want and planting them into the cultivated soil, youll have to learn about how to water them properly. Vegetables need to be watered consistently. When planting vegetable gardens in a big space, you might want to consider using a soaker hose. A soaker hose has many holes along its body that waters your garden by letting the water seep through its holes.

Planting vegetable gardens require manual labor (yes, actual work), and a lot of patience. The rewards are very well worth it, though. Especially for people who are concerned about their health. Growing your own vegetables makes sure that theres the least amount of poisonous (and in the long run, carcinogenic) particulates in it as possible.

Master Cleanse Diet Recipe – Keep It Simple

The master cleanse diet recipe is not at all complicated. After all this very successful and popular diet and cleansing program consists of only 4 ingredients and one of those is water. This diet also goes by other names such as the lemonade diet, the maple syrup diet, and the cayenne pepper diet. Bet you can guess what the ingredients are, can’t you,

Yep, you’ve got it, the ingredients are fresh lemon juice, maple syrup, cayenne pepper and water. The exact proportions will vary depending on whether or not you want to make up a glass at a time or a whole pitcher, I’ll give you the recipe for both later on in this article.

Here is the basic idea of the diet. You will go on a strictly liquid diet for ten days. During that time you will drink the cleanse mixture throughout your day for your ‘meals’. It’s also very important that you drink plenty of water. This is a mistake that a lot of people make. They think that just because there is water in the lemonade mixture that that is enough, it’s not. Drink water during the cleanse.

It’s also very important that you ask your doctor if you can go on this cleanse and diet program. I’m not a doctor and can’t give you any medical advice so make sure to ask the person who knows you and is qualified to extend advice.

Do not beat up on yourself if you fail to make it through the ten day program on your first try. It’s very common to fail. When you’re just sitting around talking about it it doesn’t seem that hard, but anyone who has had to go on a strictly liquid diet before, say for a medical procedure, can attest to the fact that it’s not easy.

If you set a start date several days up to one week in advance, you can give yourself a lot of time to get yourself in the right frame of mind. During this time you can also help prepare your body physically for the challenge by making slight alterations to your eating habits. If you are used to eating a lot of protein heavy, high carb meals you may want to lessen your caloric intake a little bit before the cleanse so the transition isn’t so shocking to your system.

Here is the single serving size recipe:

1/2 Tablespoon each of fresh lemon juice and organic maple syrup. 1/16 of a teaspoon of cayenne pepper powder and 8 ounces of water.

To make a full pitcher so you have the mixture ready when ever you want it here is the recipe:

12 Tablespoons each of fresh lemon juice and organic maple syrup, 1/2 teaspoon of cayenne pepper powder and 60 ounces of water.

Whether you mix it up by the glass or the pitcher the master cleanse diet recipe is very simple and easy to put together. Staying on this liquid only diet and drinking plenty of water for the full ten day term will help you clear out all the nasty toxins from your body and help you shed up to 20 pounds of unsightly body fat. Just make sure you talk to your doctor before you start.

Crockpot Recipes for Low-Fat Dieters

You may not believe this but there are actually a countless number of crock pot recipes for people who are on a low-fat diet. Apparently, such low fat crock pot recipes are intended for people who are watching their health and their weight very carefully. In this regard, we would want to share at least two of the low fat crock pot recipes that most dieters prefer to prepare.

Arroz Con Pollo is one type of a low fat crock pot recipe that we highly suggest. You will need to prepare such ingredients as two tablespoons of freshly chopped cilantro, two cups of cooked rice, ten ounces of frozen peas that have been thawed, two tablespoons of red wine, one half cup of chicken broth, eight pieces of chicken thighs that do not have skin, two teaspoons of chili powder, one teaspoon of oregano, one clove of crushed garlic, one fourth teaspoon of pepper, and one half teaspoon of salt.

Mix such ingredients as chili powder, oregano, garlic, pepper, and salt together in a bowl. Such spice mixture should be sprinkled all over the chicken pieces. Once each of the chicken pieces is sprinkled with the spice mixture, you may place all of them in a crock pot. The wine and the broth should then be poured all over the chicken pieces. Cover the crock pot and let it cook for at least five to six hours using low temperature. After five to six hours, remove the chicken and set the crock pot on high temperature. Add the peas soon thereafter and cover the crock pot again and let the ingredients be cooked for another seven to ten minutes. The cooked rice as well as the chicken should then be added into the crock pot. Before serving, make sure to sprinkle the freshly chopped cilantro on the dish.

Another low fat crock pot recipe that we suggest is the recipe for Basil Chicken. This is also an easy-to-prepare dish as it only requires few ingredients and can also be cooked while the crock pot is running unattended.

The ingredients include one half whole green pepper that is sliced, one can of cream of celery soup, one half teaspoon basil, one half teaspoon of pepper, and four whole chicken breasts that are skinless.

To begin the procedure for this low fat crock pot recipe, you must place first the skinless chicken breasts in the crock pot. The chicken should then be sprinkled with basil and pepper. The cream of celery soup should then be poured over the chicken pieces. Afterwards, the sliced green pepper should be placed on top of the chicken that is covered with soup. Cover the crock pot and let it cook for approximately eight hours. The crock pot should be set on low temperature for this low fat crock pot recipe. You do not have to wait for eight hours for this recipe to be cooked. There are instances when six or seven hours will do. This recipe only contains four grams of fat and is composed of 55 grams of protein and three grams of carbohydrates.

Cooking Up Good Scents

Aromatherapy is a wonderful natural alternative to modern medicine when it comes to treating common ailments and mood swings. In aromatherapy, there is no risk of ingesting blends of herbs that may have harmful or adverse effects on us. Aromatherapy uses essential oils that benefit us in two ways: through the connection of our olfactory sense with the brain and as well as through the direct application of essential oils to the skin.

The use of essential oils for aromatherapy can be easy. All you need is to gather the right resources to increase your knowledge on the different types of essential oils and their benefits. You can go down to your local bookstore and browse the shelves for information on essential oils and aromatherapy. You can also choose to go online and browse the web’s resources and tips from various aromatherapy practitioners and experts.

To get you started on your quest, below you will find aromatherapy recipes for treatment of some common problems.

Aromatherapy recipe for the skin

Aromatherapy for the skin is beneficial because the essential oils provide much needed moisture and healing to skin layers. It also helps invigorate your skin cells to promote new skin cell regeneration. Certain essential oils are also extremely useful for treating bacteria and fungal infection as well as inflammations.

If you have dry skin, you can use rose, sandalwood, lavender and myrrh. If you have sensitive skin, try this aromatherapy recipe: combine 2 drops of chamomile with a drop each of myrrh and rose plus 2 ounces of jojoba or almond oil. You must store this mixture in an airtight dark glass container which should be kept in a cool and dark place. You can then use this aromatherapy recipe to treat sensitive skin.

If your problem is mature skin, you can revive the youthful properties of your skin using a simple aromatherapy recipe. All you have to do is combine 2 drops each of frankincense and myrrh with 2 ounces of jojoba or almond oil. This easy rejuvenating treatment is the most natural way to a more youthful skin. Remember to store this aromatherapy recipe accordingly.

Acne can also be treated by a simple aromatherapy recipe, which involves combining 15 drops of tea tree oil with 10 drops of lavender along with 2 ounces of jojoba or almond oil. For a whole body treatment however, you can try the simple aromatherapy recipe of combining 1 cup of milk with 1 teaspoon each of honey, olive oil and vinegar with 2 drops each of spearmint and lavender. You can use this wonderful aromatherapy recipe with mixing it in a warm tub of water for a relaxing and invigorating bath.

Aromatherapy for the hair

Don’t neglect your crowning glory! Simple aromatherapy recipes can help you get your mane in tip top shape. For instance, if you suffer from dry hair, try this aromatherapy recipe to give life back to your parched hair: combine 1 drop of rosemary with 1 tablespoon orris root powder. Simply sprinkle the mixture on to your hair and scalp and brush off thoroughly after 5 minutes.

If coaxing your hair to grow is what you want, a simple aromatherapy recipe can do the trick. Simply combine 10 drops rosemary with 8 drops of bay along with 7 drops cedarwood and 50 ml of jojoba oil. Apply this aromatic mixture of essential oil to your scalp and cover with a shower cap or towel. Leave it like this overnight and rinse thoroughly when you wake up.

An Introduction To Bartending

Latitude up your own disincentive is actually entirely easy to do. There are however, a few things that good bartenders need to know to run a bar efficiently. In order for a bar to succeed, youll need to hold the basic wines, liquors, and spirits – along with the right equipment. Although these things are foremost, bartenders also need the proper technique for mixing drinks and cocktails as well.

With bartending, the location of the bar is very important. The bar should be placed in an area that is easy to reach and provides plenty of space behind it. Skillful should be plenty of one’s turn for glasses and drinks, along with a chair or two as well. The bartender has to learn the area behind the bar, and know everything about actual. Bartenders need to know their area vigorous – and how to perform their mixing duties when business heats up.

Another job bartenders have is knowing their drinks. Bartenders are responsible for serving and mixing drinks, which is a wide variety to say the least. It can be nearly bizarre to know every possible drink mixture, why is why most bartenders use mixing lists hidden under the bar to help them know what goes in each drink.

Bartenders dont have a lot of time to homogenize drinks, which makes embodied nearly impossible to read each and every label. To help with this dilemma, you can always arrange your alcohol and drinks a certain system, to ensure that you know where everything is. This behaviour, when field picks up and you gem yourself short on time – youll know where everything is.

To become a successful bartender, or mixologist, it takes years of practice. There are several styles of bartending as well, including the well avowed and very impressive ability attraction. Flair bartending involves very impressive techniques and tricks, which leave leave customers truly amazed. Flair is the hardest style of bartending to perfect, taking years and years of practice. Bent bartenders all around the world will tell you that flair brings the powerfully crowds – although it can and cost a lot of cabbage in broken bottles along the way!

Each and every bar should also have the basic spirits, such as Tequila, Vodka, Rum, and Gin. There should be also be fruit juices on hand because well, such as lemon juice, orange juice, and even pineapple juice. Almost all mixed drinks need juice, such as screwdrivers – which require both Vodka and orange juice. Mixed drinks are very popular, making it necessary for the bartender to be a good mixologist – and have the right materials on hand at all times.

A lot of drinks that bartenders mix will require special gadgets such as shakers, measuring cups, rinsing bowls, and straws. Shakers are the most commonly used gadget, as they are essential for mixing alcohol. Bartenders will also need to keep cloth on hand as well, to quickly clean reinforcing spills and dust down the mixing area from time to time.

As a career, bartending can provide you with a lot of pesos. If you go to college and learn the techniques required for bartending, you can make more money than you over thought possible. The job is high paying, a lot of fun, and a great way to meet new people. There are a suite of colleges and universities that offer bartending, or you can study online. No matter which way you go – bartending will be a lot of fun and will take you far in life as an exciting career.

( word count 588 )